Today we’re going to go step-by-step through setting up everything on Facebook that you need to run ads. We get tons of questions about Facebook pages, profiles, ads, groups and more. But Facebook ads are ultimately what you are going need to drive you leads. So today you will learn:

- An introduction to Facebook ads
- How to find Facebook ads manager
- How to create a Facebook ad pixel
- How to create an audience to retarget your website visitors
- How to show ads to your CRM database
- How to create a lookalike audience
- How to create your first Facebook ad
Introduction to Facebook Ads

Okay, so now for the meat and potatoes of Facebook marketing – Facebook Ads.
70% of real estate clients work with the first agent they interview. 8 out of 10 people say they will use the same agent again, but only 12% actually do. 40% of all home sellers and buyers found their agent from marketing and that number is growing. That’s why the smartest Realtors make sure their lead generation is anything but average.
So where can you find your these customers?
7 out of 10 people in North America log into Facebook everyday. Furthermore, when they are on their smart phones they spend 25% of their time on Facebook. Facebook advertising is a way for you to get in front of them.
Facebook allows you to create ads and pay to display them to any audience of your choosing.
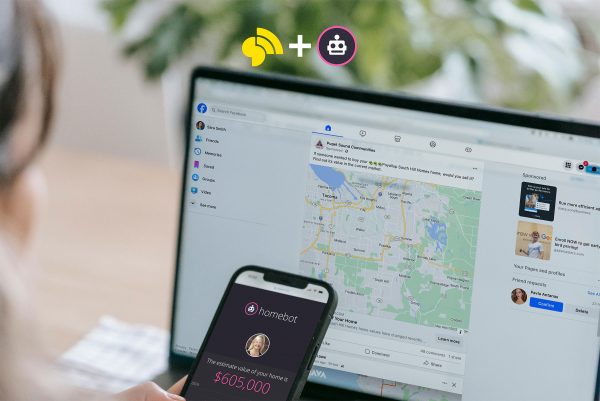
Looking for ready-made ads with stats showing what’s working right now, in today’s market? No worries, StreetText brings this powerful marketing opportunity to you. With StreetText you will have access to the best performing ads and a system that will capture your local buyer and seller leads right from Facebook, on your behalf, every day. No batteries (or experience) required. We make it so simple that anyone can do it, even if they haven’t run a Facebook ad before. Try it out for 7 days for Free.
How to find the Facebook Ads Manager
- Click on the Down Arrow on the top right of your Facebook account
- Click “Manage Ads“
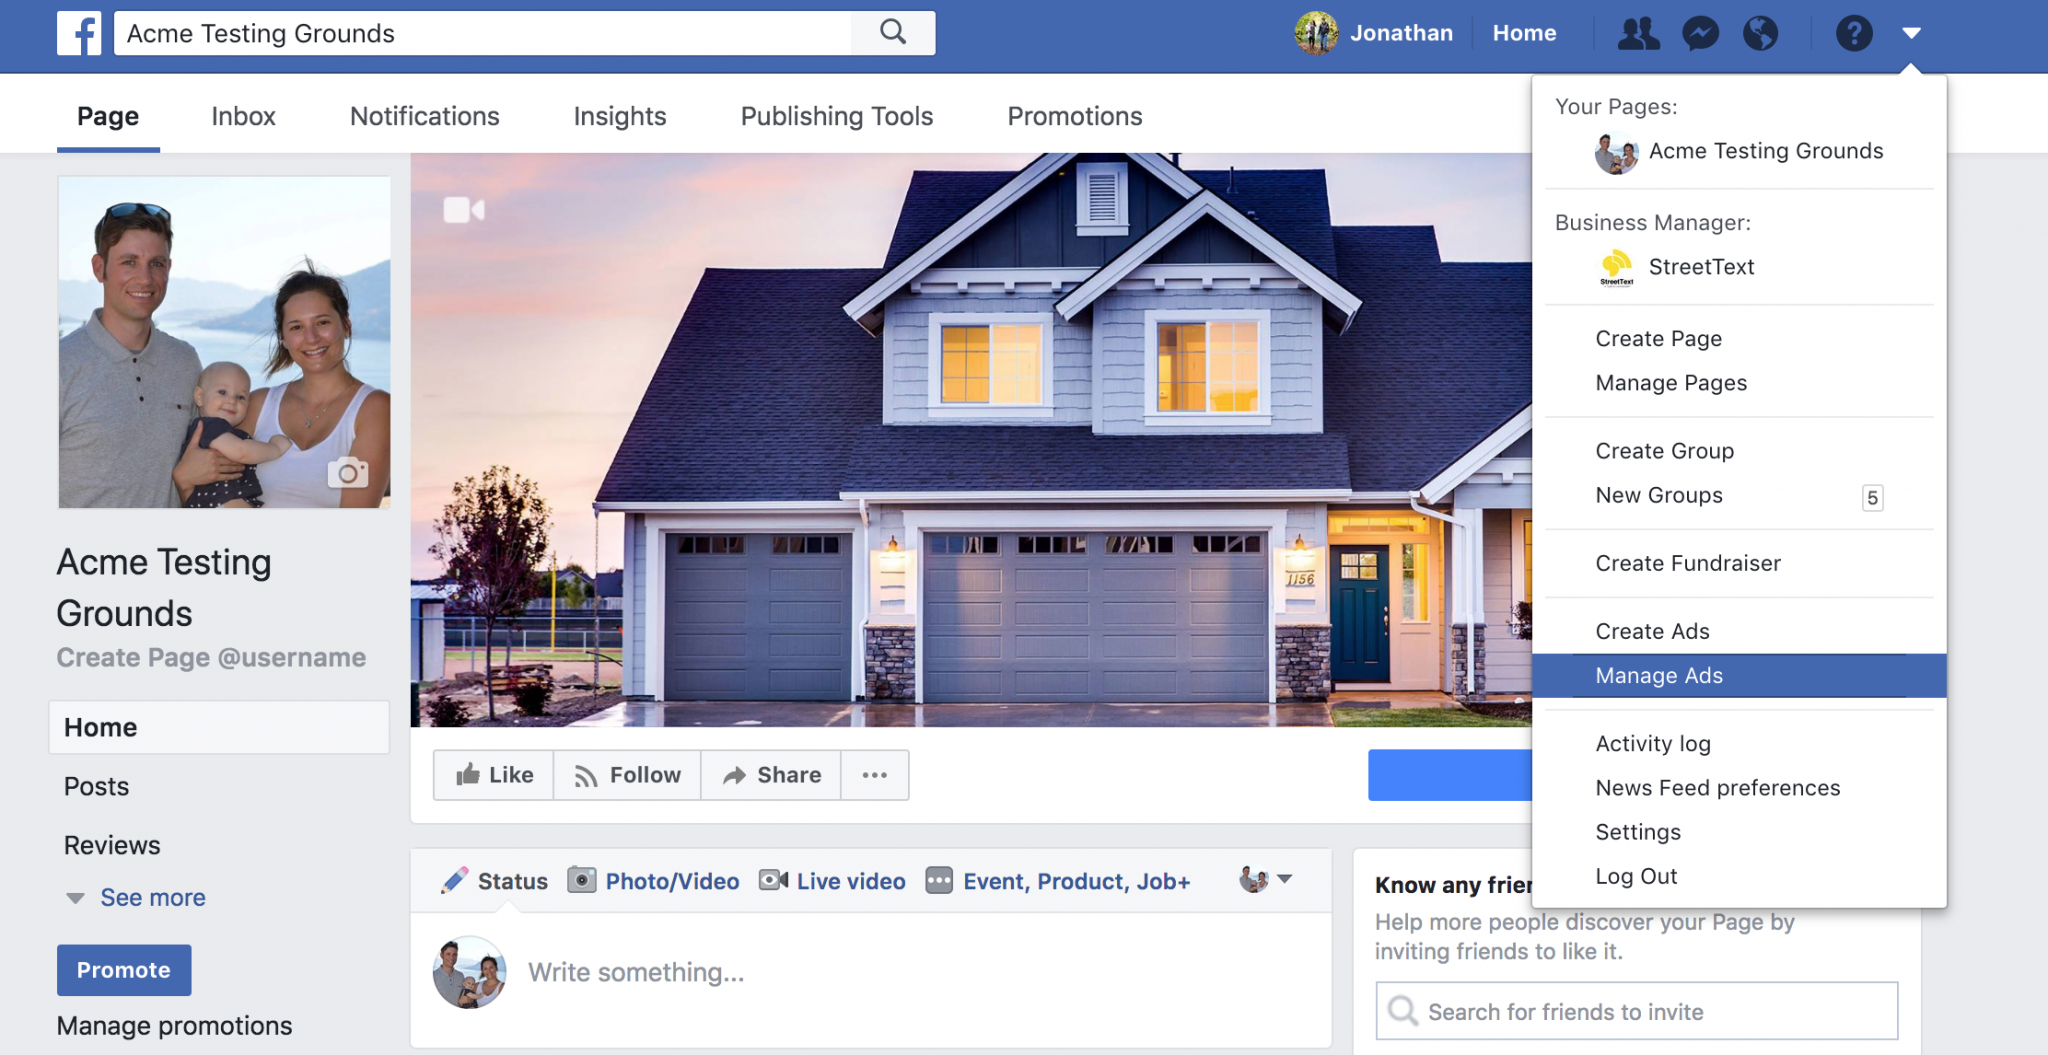
That’s going to bring you to your Ads Manager
From there you are going to have to setup your account. You will need to input a credit card and some information. It’s all pretty self-explanatory. So follow Facebook’s steps and then jump back here when you’re done.
How to create a Facebook pixel to track your ad performance
So the first thing you’re going to want to do in Ads is go to your Pixels section.
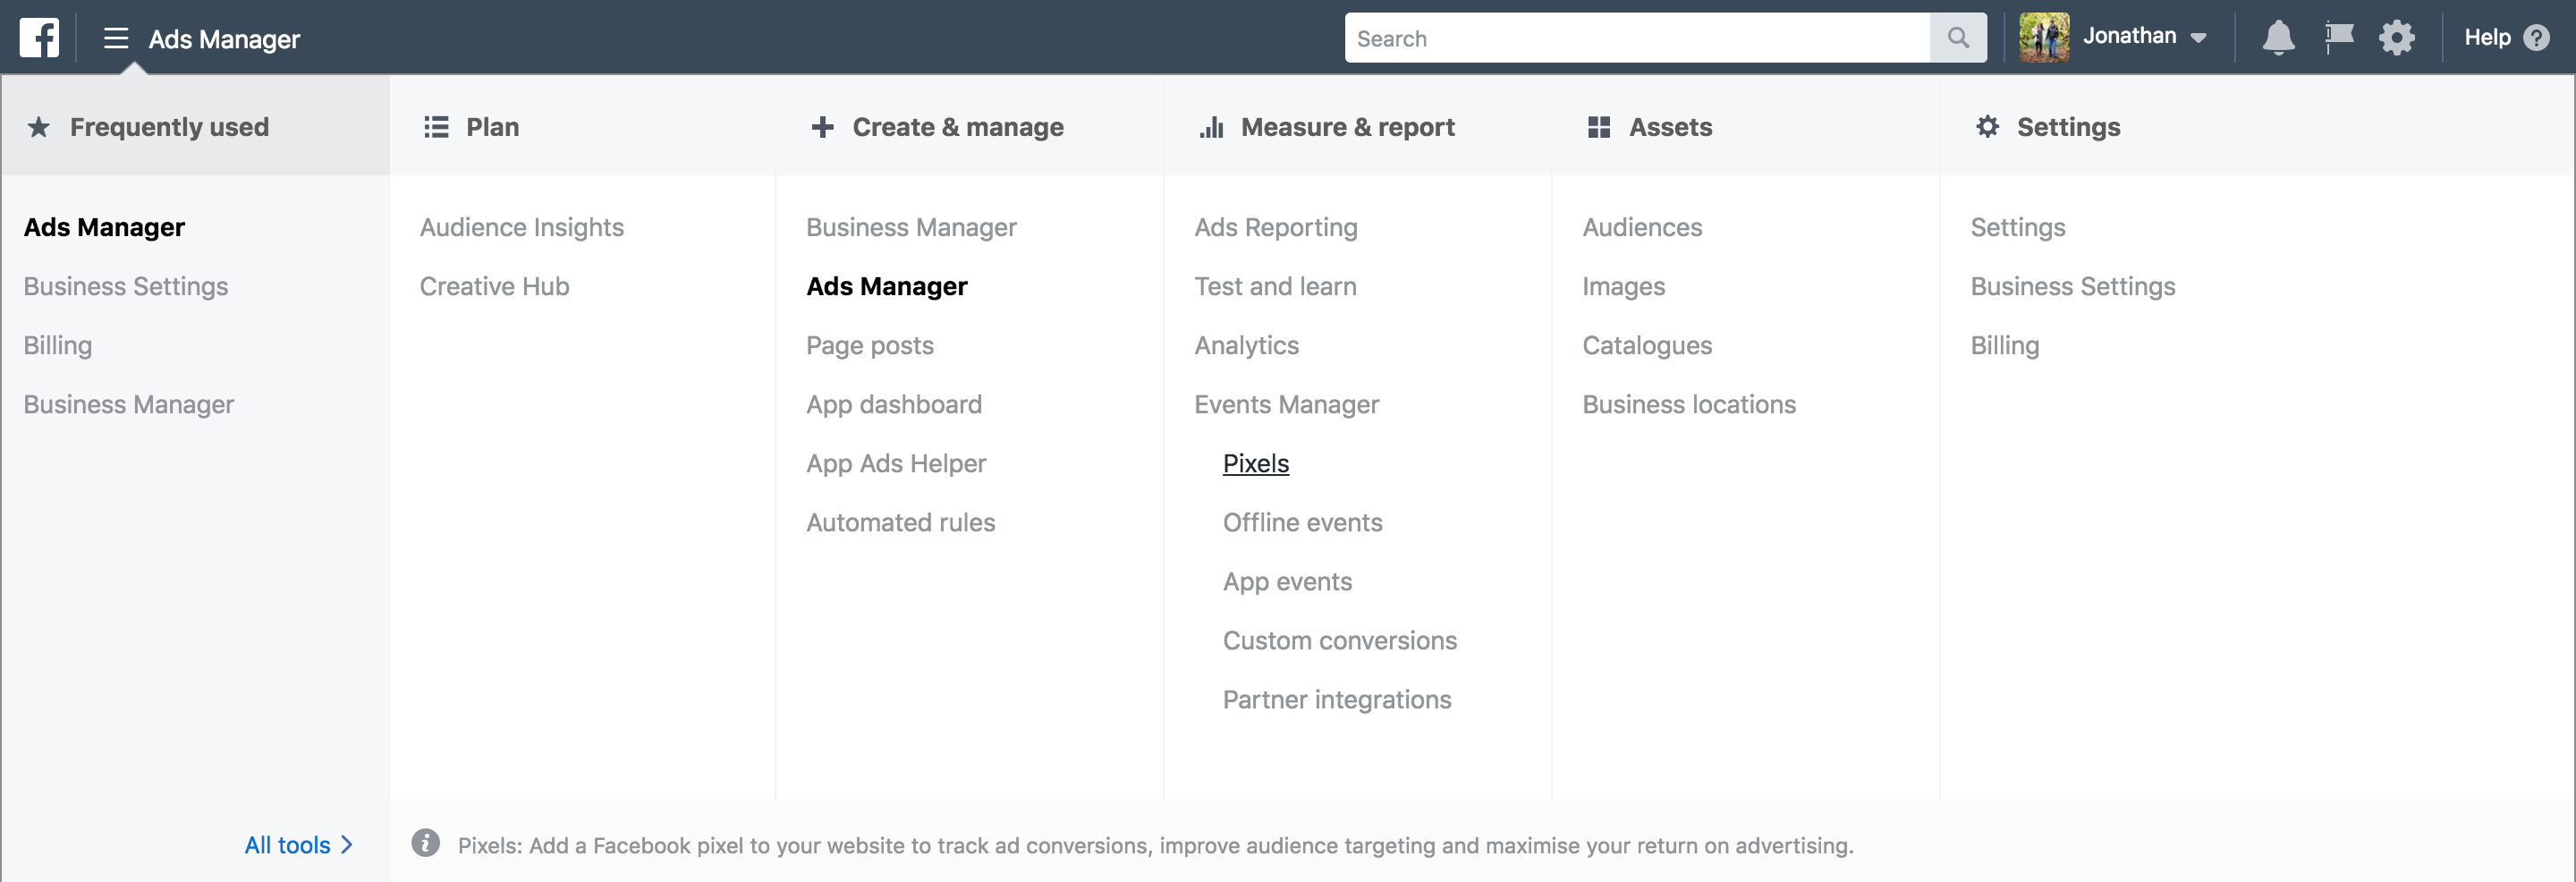
- Click on the top left menu icon “Ads Manager“
- Move your mouse to “All Tools >” and click on that
- More options will open. Find and click on “Pixels” under the heading Measure & Report.
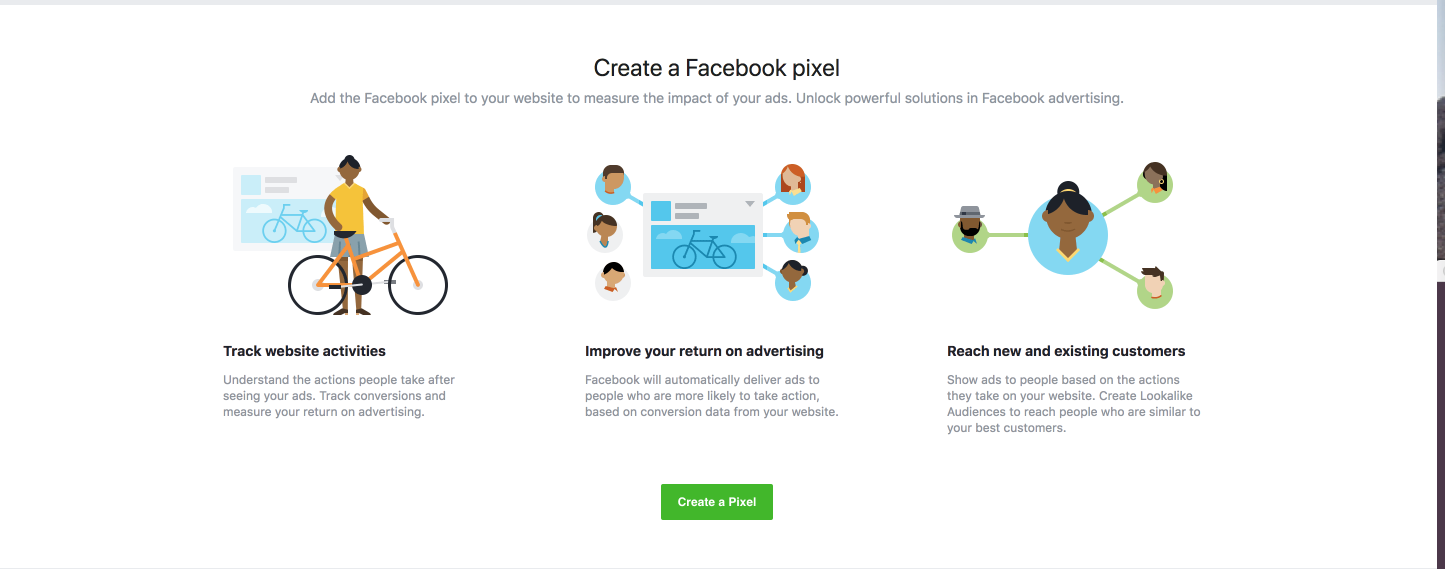
Next, we are going to create a pixel.
- Click Create a Pixel, follow the steps
- Give your pixel a name. Any name will do. Then click the “Create” button
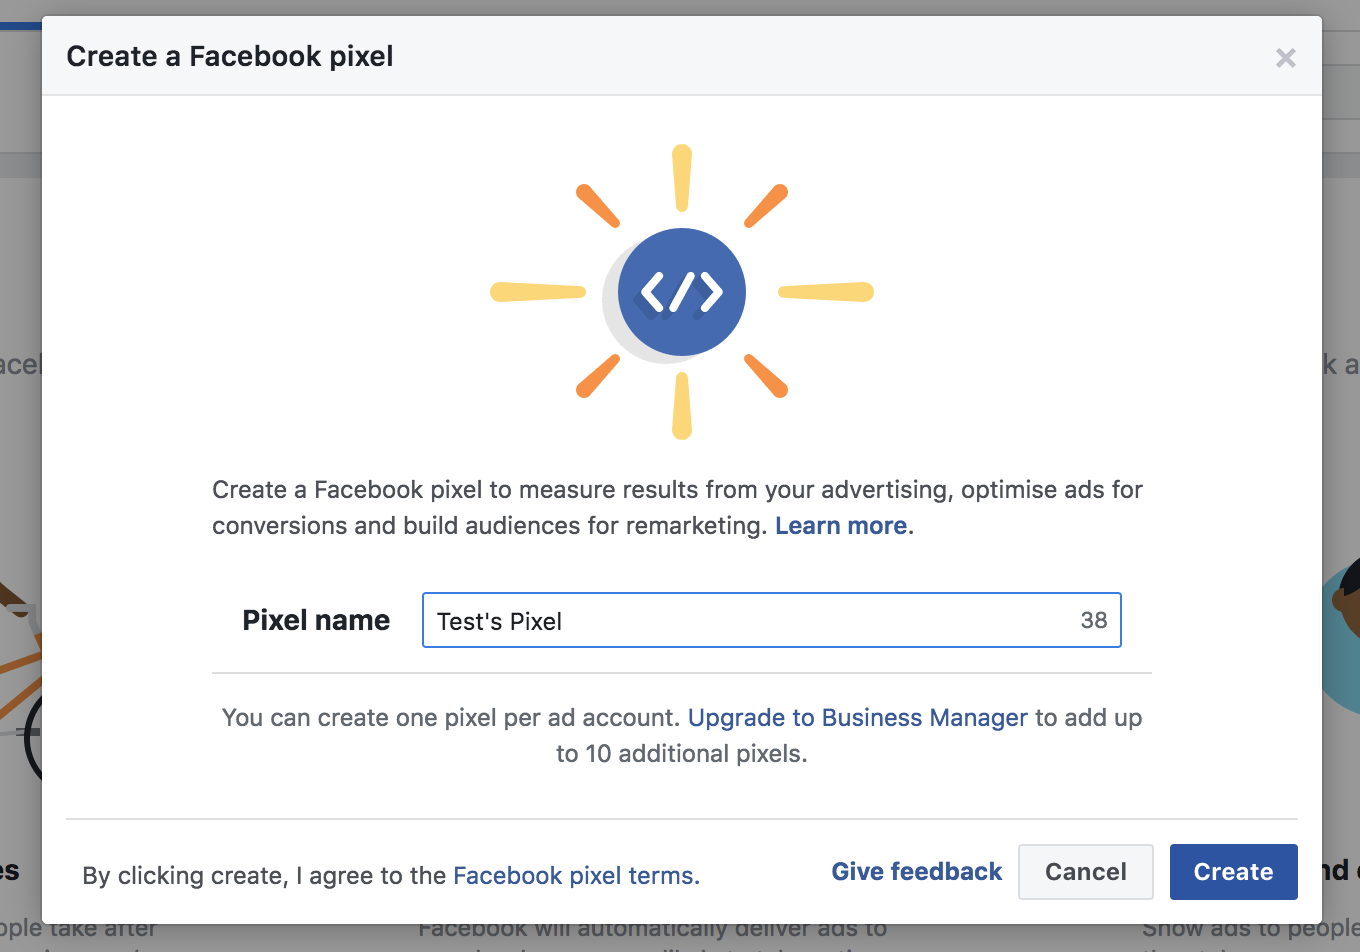
You will see a modal window open showing you options to Install your pixel code
- Click “Manually install the code yourself”
- Click on the code in section 2 to copy the entire pixel code
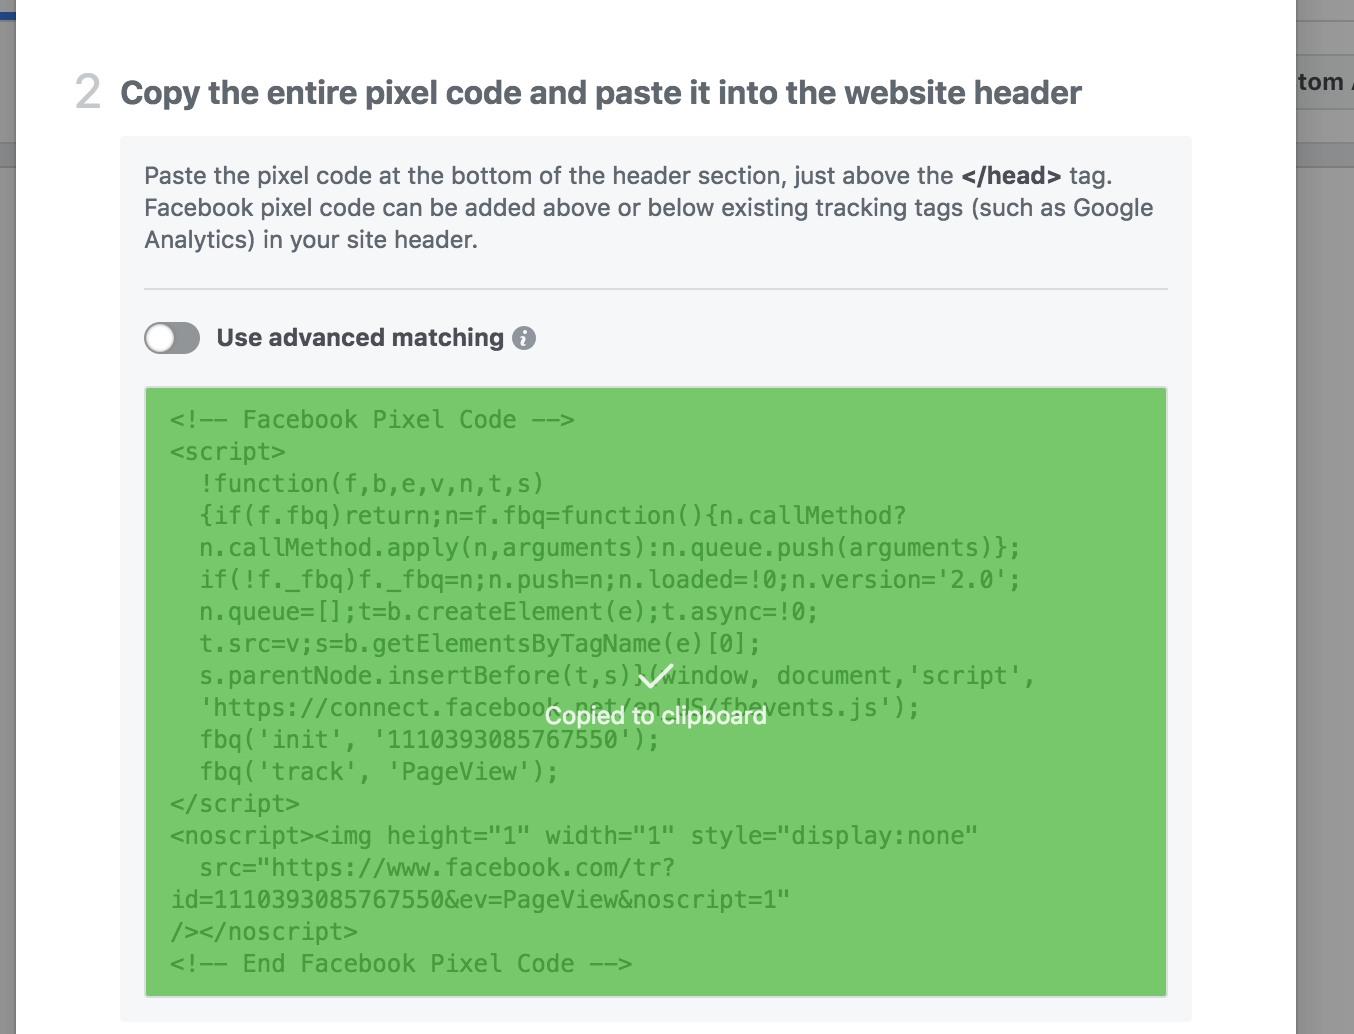
Now, once you’ve copied your pixel code you will want to paste it into your website that people will be visiting from your Facebook ads.
Once done, you will want to setup events.
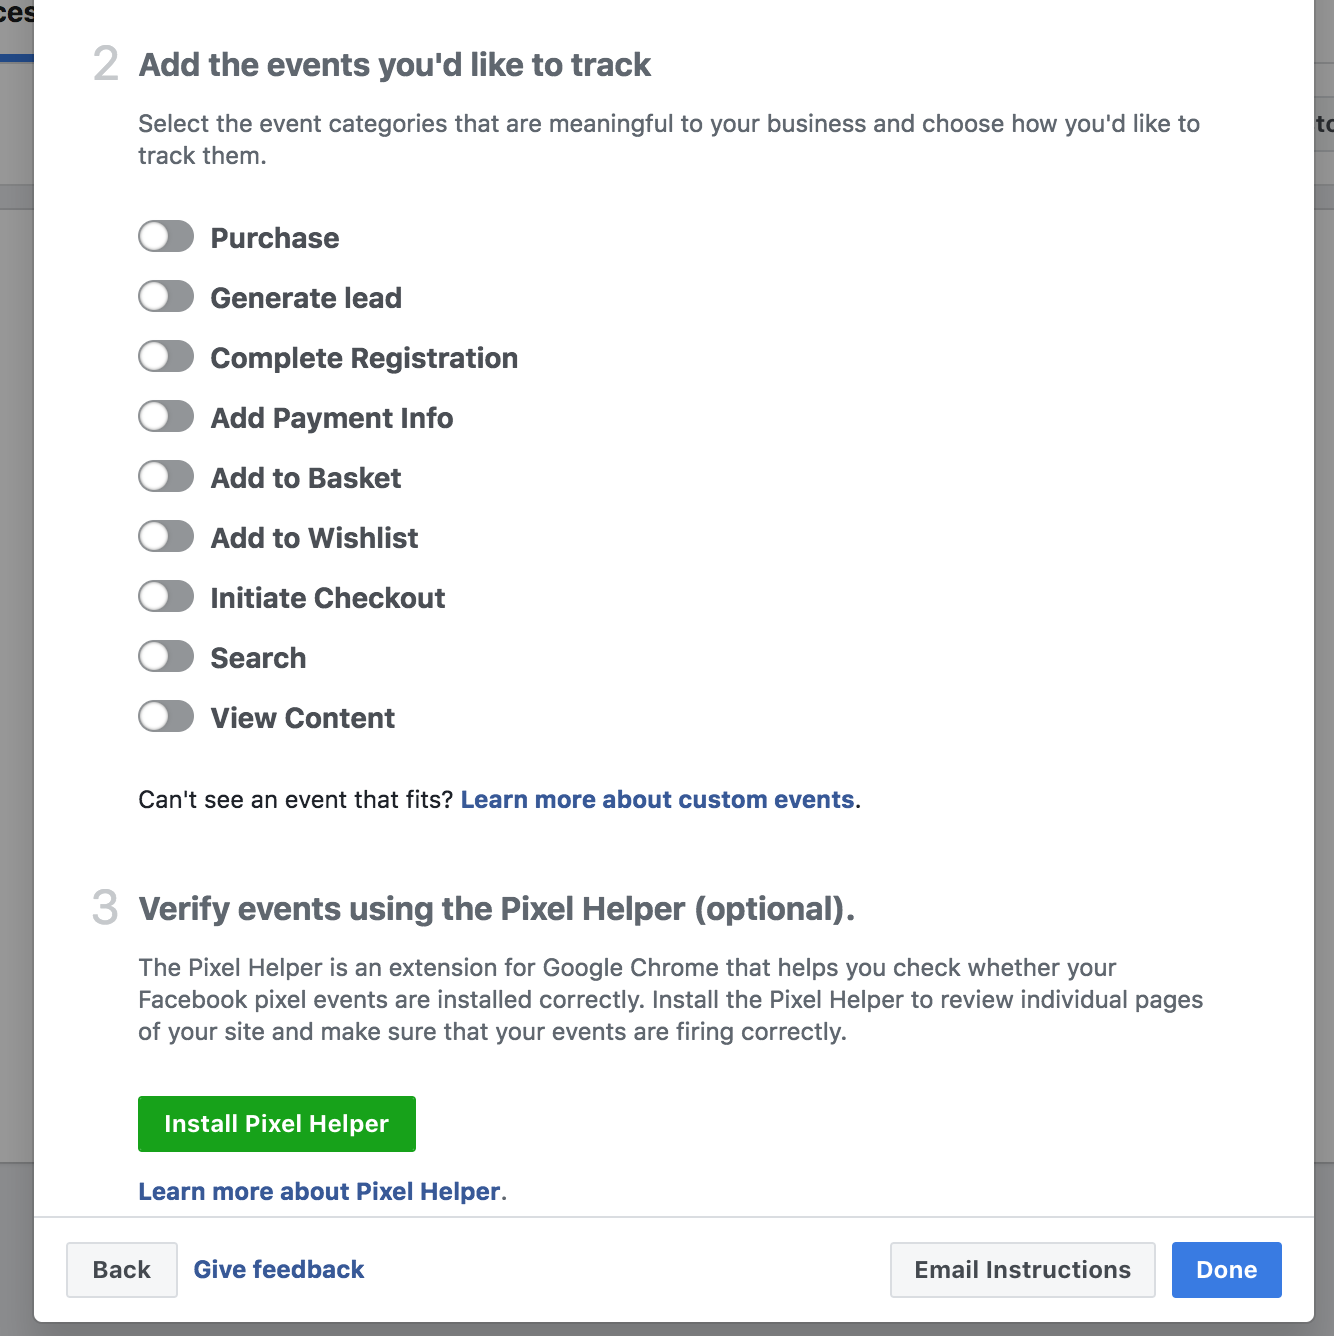
By adding events, you enable Facebook to show ads to people who are likely to take a specific action (which we call a conversion) or build audiences of people who triggered a specific event. You can also add parameters that pass unique information, such as the monetary value of a purchase.
- Enable all the events you want to track. For leads, I recommend enabling Generate Lead, Complete Registration and View Content.
- Once complete, click “Done”
Facebook has made their Pixels nice and simple. You use the same pixel for multiple websites. So if you have more than one website, use the same pixel in all of them.
Having the code embedded into your webpage will allow you to track the performance of your ads, create a retargeting audience, and allow Facebook to monitor of the ad traffic.
You may be wondering, how do you ensure that you are only targeting people that visit one of your sites? It’s easy. The next thing I will show you is how to setup audiences.
Next, create an Audience on Facebook

- Click the button “Create Custom Audience”
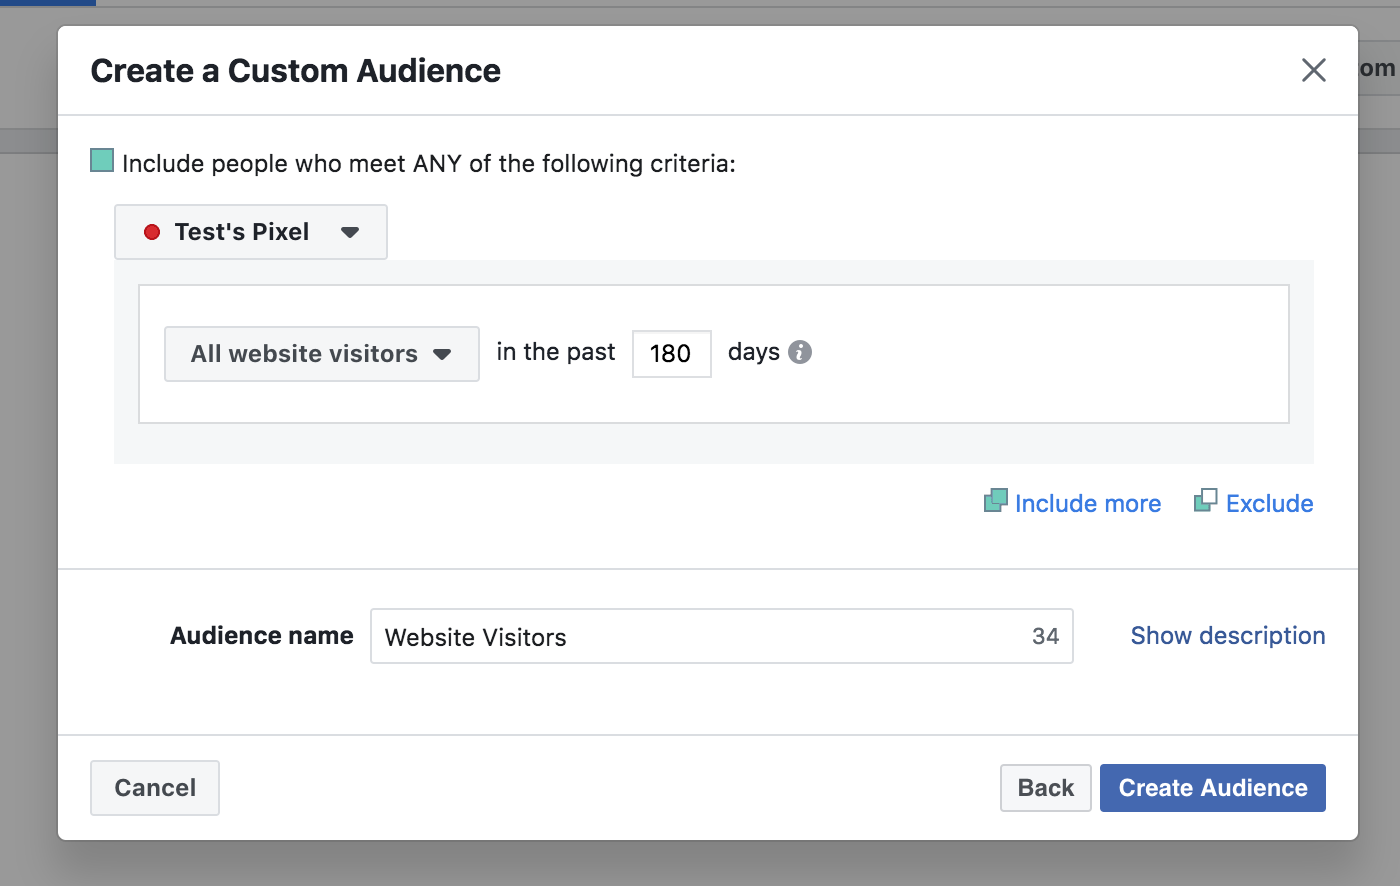
A modal window will open where you can set your options. You can get really specific here but I find that it’s best to keep things simple with Facebook ads.
- Leave the settings as they are.
- Increase the days from 30 to 180.
- Name the audience “Website Visitors”
- Click “Create Audience”
What that will do is ensure that anyone who has visited your website in the past 180 days is in this audience. But remember, tracking will only begin after the pixel is installed. So it will take time for your pixel audience to grow. Best to do it sooner than later. As the old proverb says, “The best time to plant a tree is 20 years ago. The second best time is now.”
Next up, let’s create an audience using your CRM contact database to enable you to retarget them.
As long as you have some sort of tool that you are using to manage your contacts or email list such as Google, Gmail, or a CRM you can use that list to create an audience on Facebook.
What you can actually do is export your contact list (customer file) with their email addresses as a CSV file and upload them directly into Facebook.
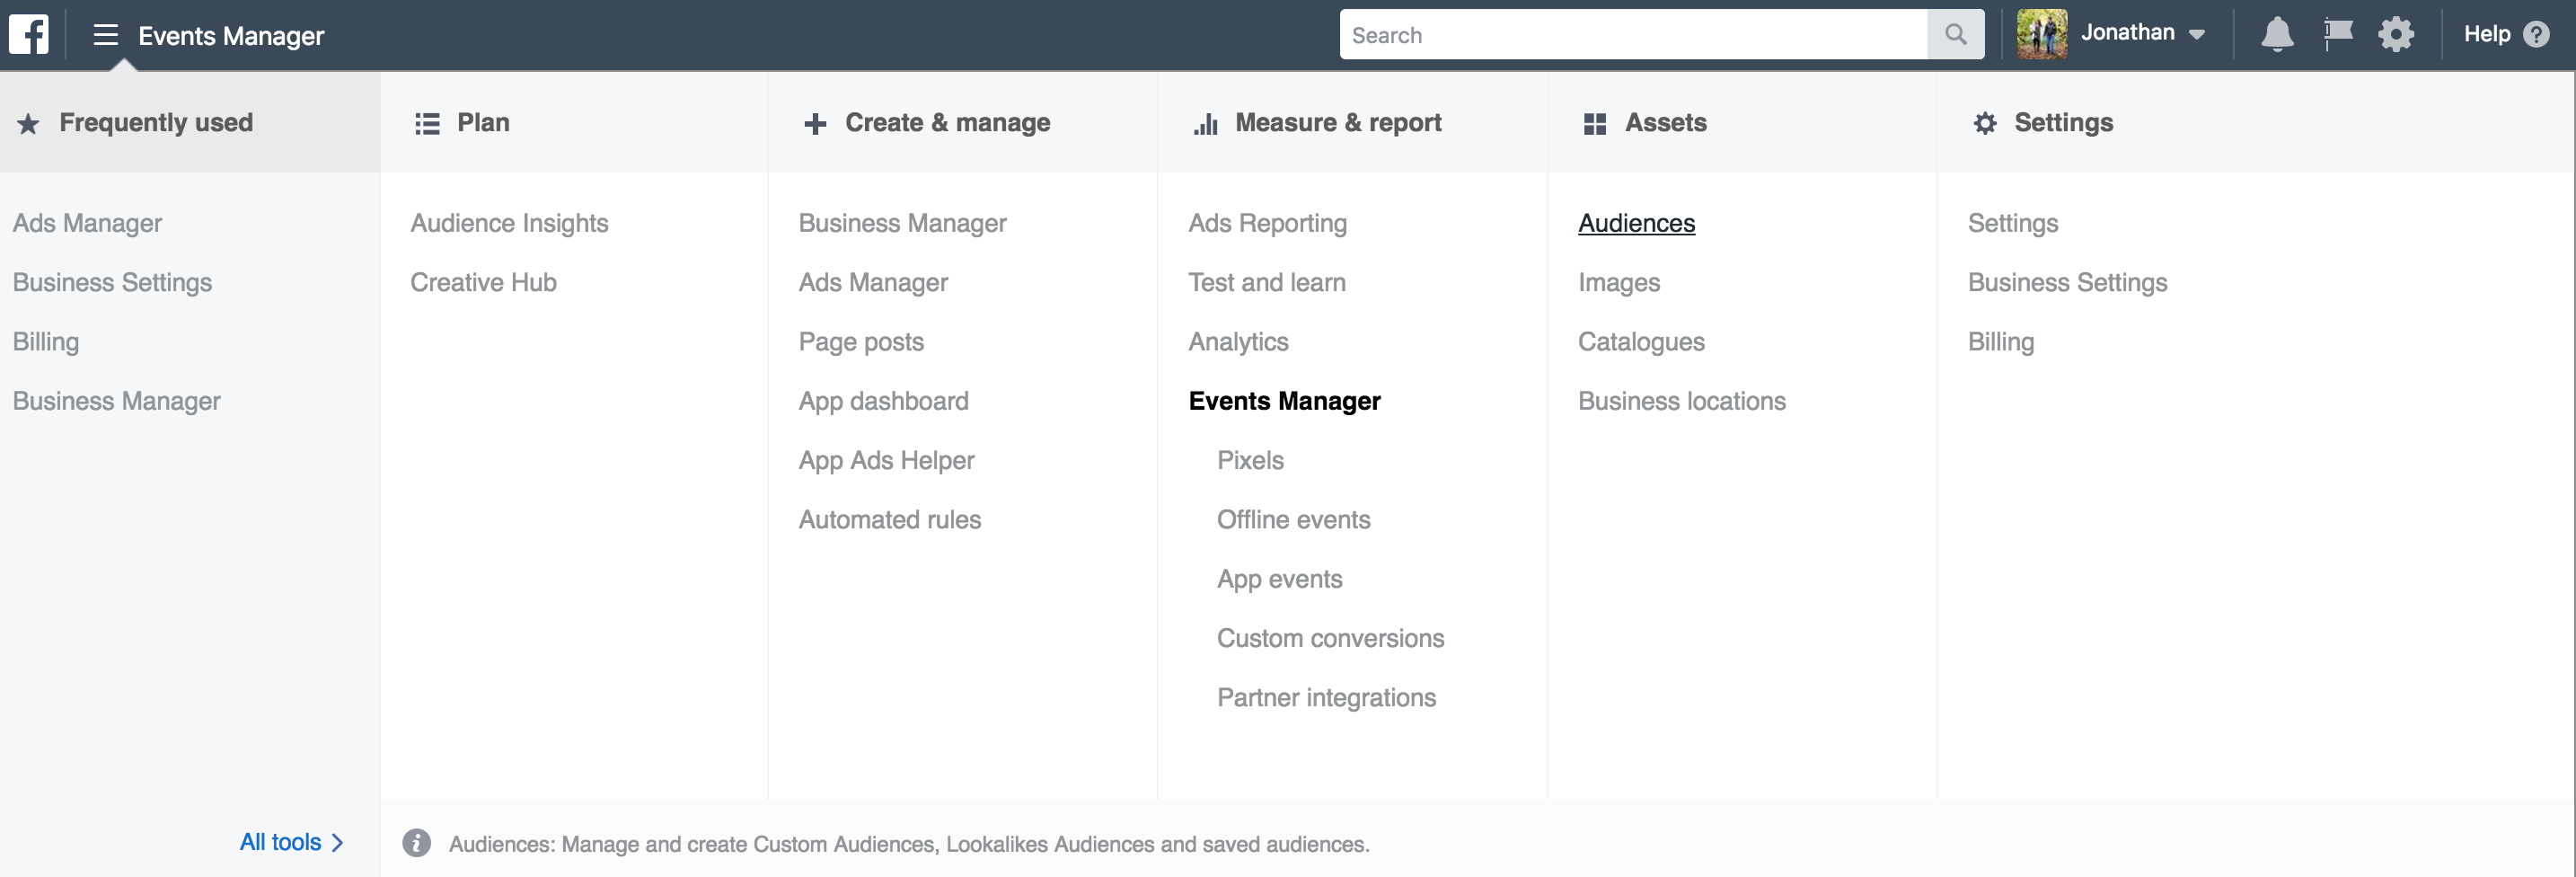
- Navigate to Audiences page
Click the top drop down menu again, then click “All Tools >” and find “Audiences” under the Assets heading
Next, click “Create Audience”
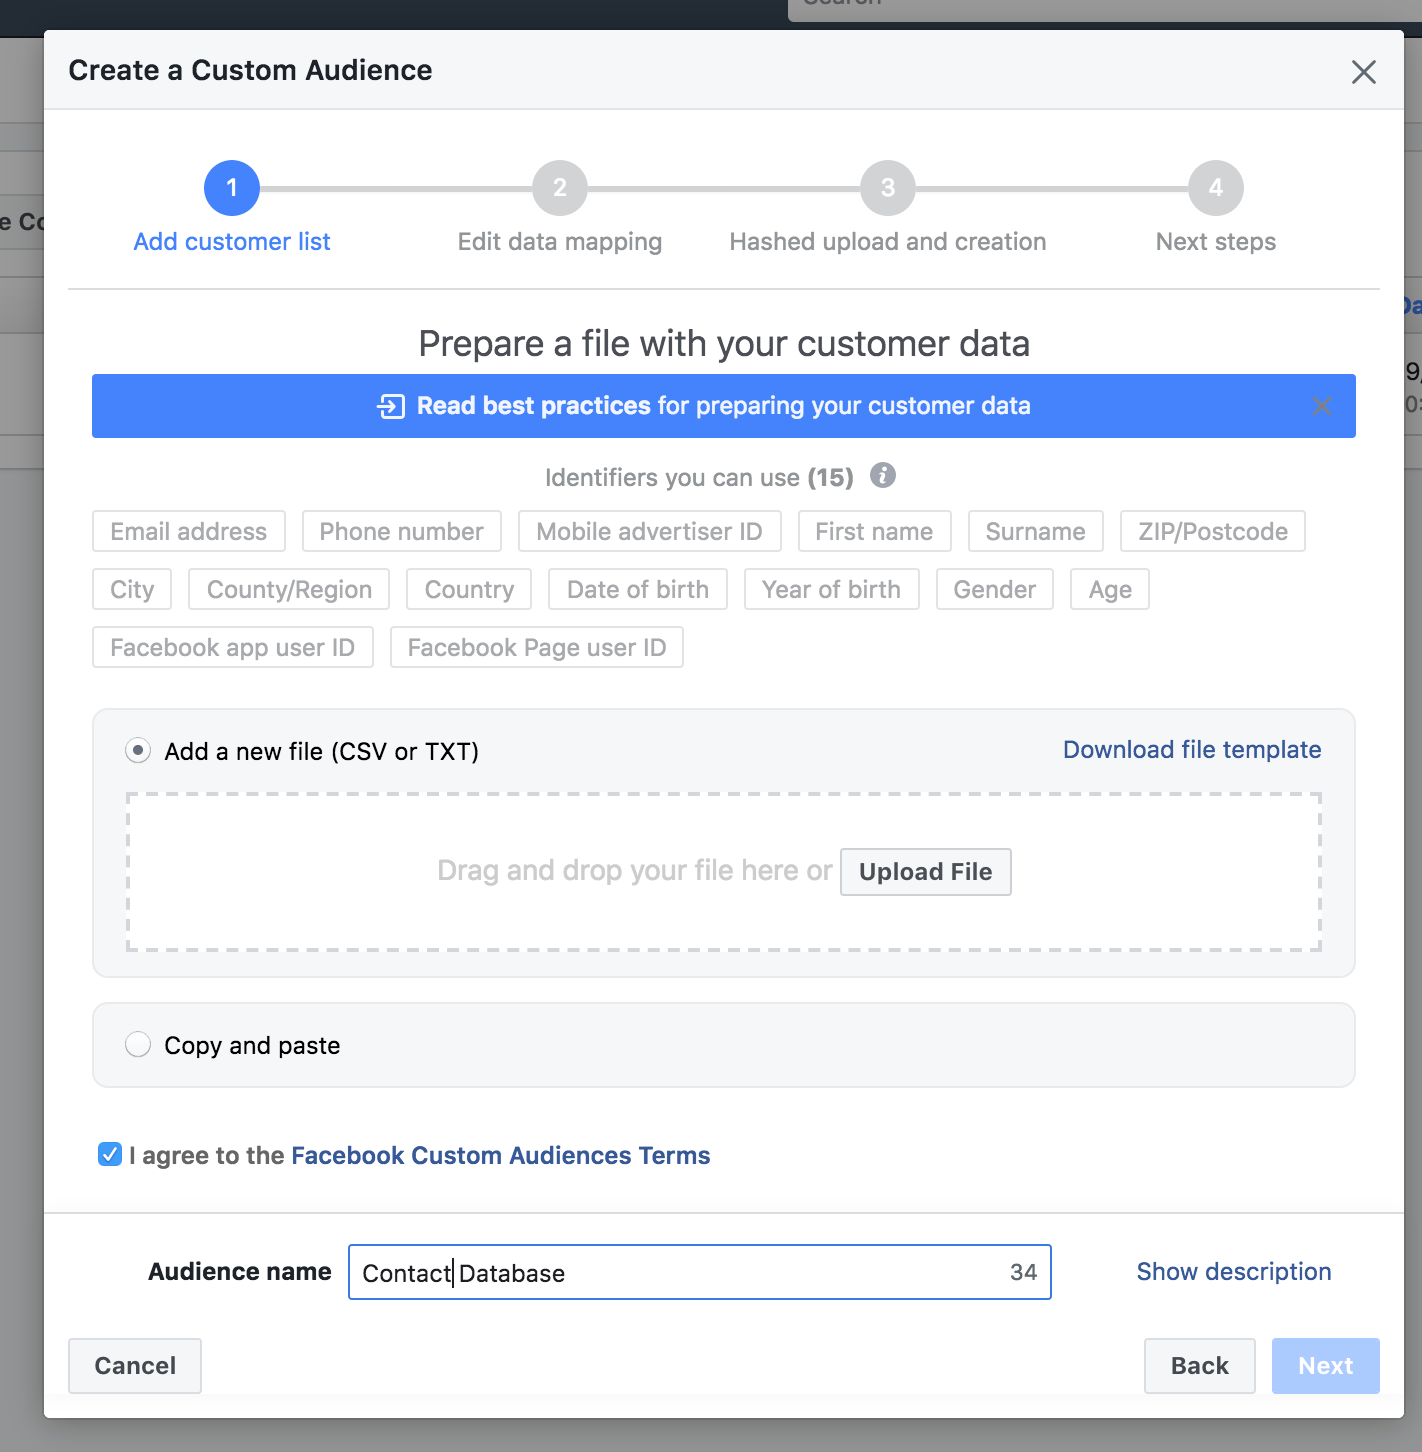
This will open a modal window

- Click the option for “Customer File”
- Next, choose “Add customers from your own file”
- Upload your CSV file
- Name your new audience “Contact Database”
- Click Next, and you are good to go!
Now you can run ads directly to these people.
How to create a Lookalike Audience
Facebook is very powerful in how it allows you find people who are similar to people you have already done business with. What it does is compare user attributes across a number of data points and as a result is able to accurately find people who are similar to your list. It may sound super complicated, but luckily it’s easy for you to use.
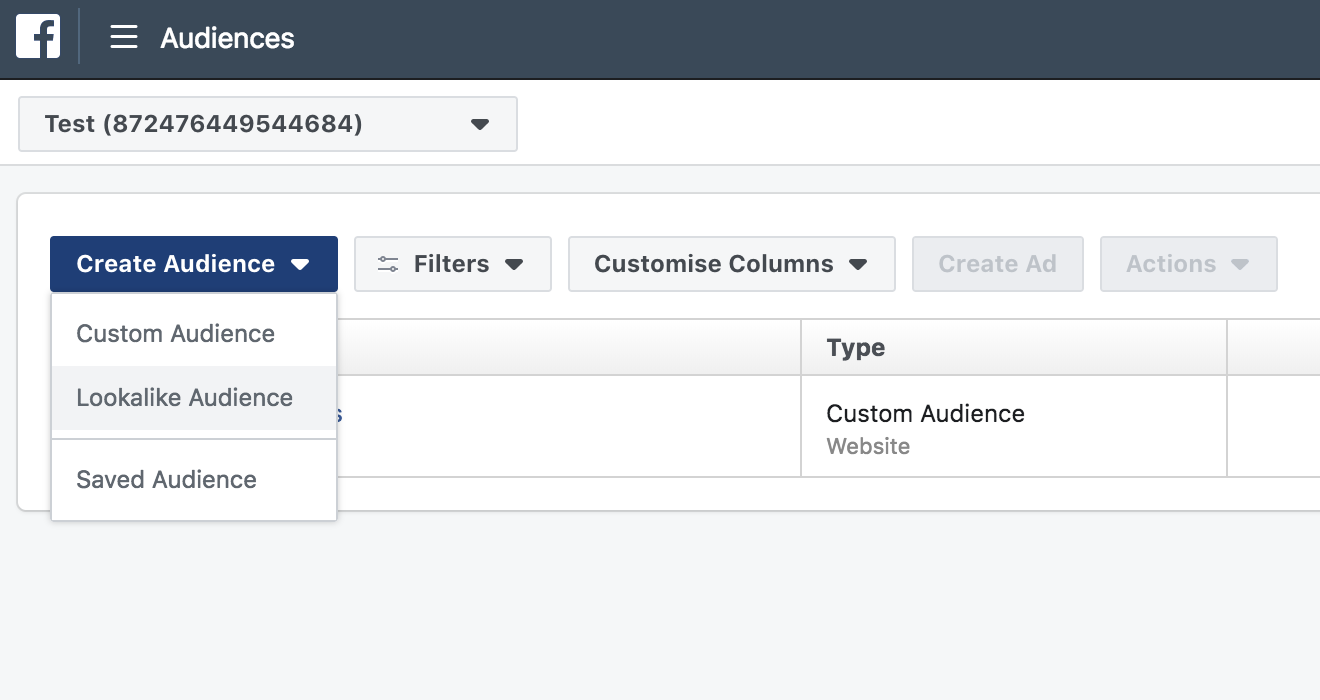
Step 1. Click “Create Audience” then select “Lookalike Audience”
A modal window will open to Create a Lookalike Audience.
- Choose the audience you want to use. If you created a Contact Database audience in the step above, select that one to find customers similar to the ones you are already working with.
- Next enter the area you want to target in the Location field. If it’s a city, zip code, or town, enter it here.
- Then you can select how big you want the audience to be.
- Finally Click “Create Audience
And you’re done ready to create an ad!
How to create a Facebook Ad
Overview:
Facebook Ad Manager can be a bit confusing. So let’s go through it together now – one step at a time.
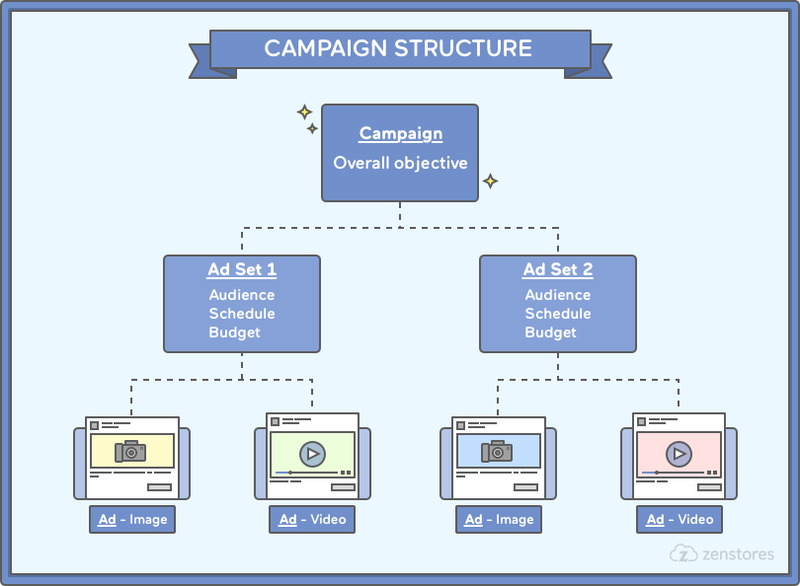
When you create an Advertisement on Facebook you have to create a Campaign, an Adset and then an Ad. Rather than create a new campaign when ever you create a new ad. To start just create two campaigns. Name them Branding and Lead Generation.
What’s a Campaign?
The purpose of a Campaign is to organize your ads by objective. Likely you will want to build your brand. And it’s also likely that you will want to capture leads. Those are two great campaigns to start with.
What’s an Ad Set?
Think of an Ad Set as your target audience. Each ad set allows you to define a unique audience, budget and schedule. This way you can have two ad sets targeting different neighborhoods, as an example.
What’s an Ad?
The ad is what you will be showing Facebook users as they scroll through their newsfeed, instagram account or see on their sidebar.
Okay, you are now ready to create your first Facebook campaign
Let’s create a campaign to build your brand.
Click the “Create Ad” button on the top right hand side of your Ad Manager account. This will load a page with a lot of options to pick from. You can pick the option that makes the most sense to you. For now, click on the “Engagement” objective as that will optimize your ads to get more likes, clicks and comments. Who doesn’t like seeing those thumbs up!
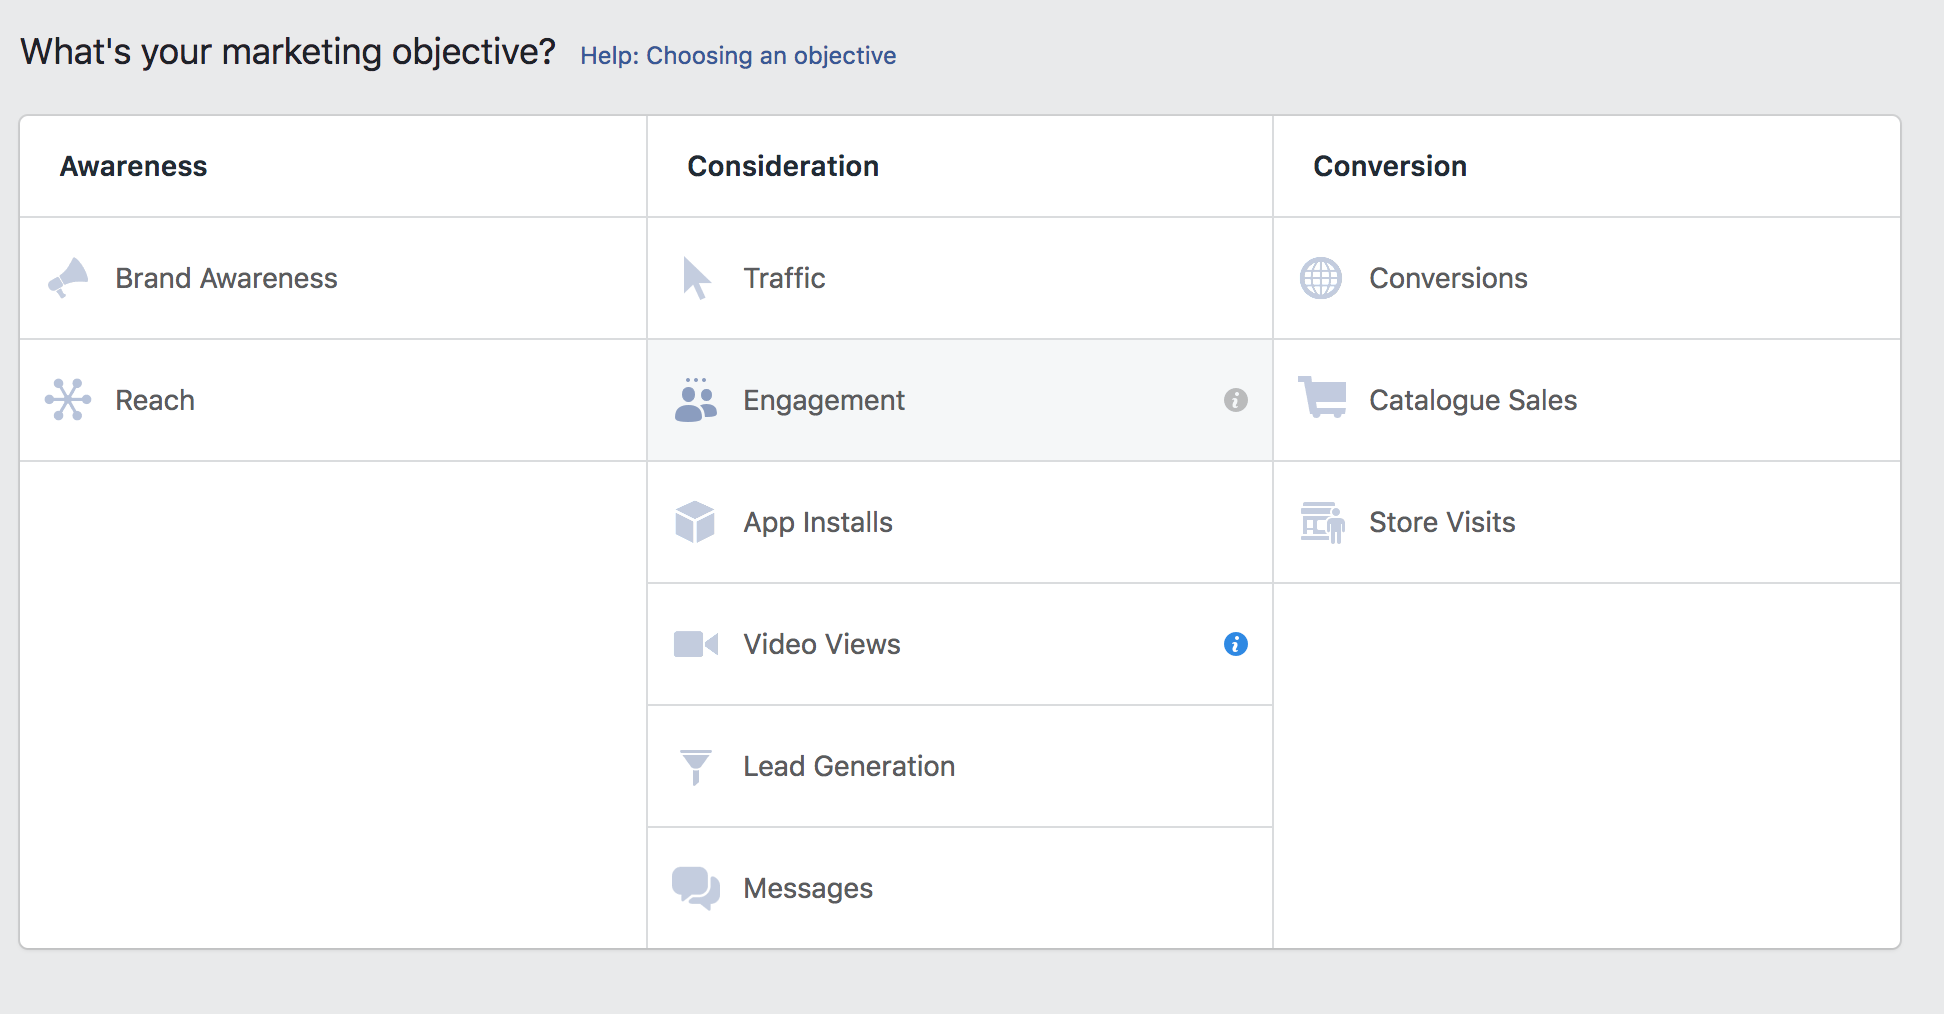
Next, scroll down and name your campaign “Branding” and click continue. This will take you to the option to create your Ad Set.
Nice, let’s create your first Facebook Ad Set!
First off name your Ad Set. You will want to remember who you are targeting. Let’s assume you are targeting past customers from one the custom audience you created earlier in the tutorial.
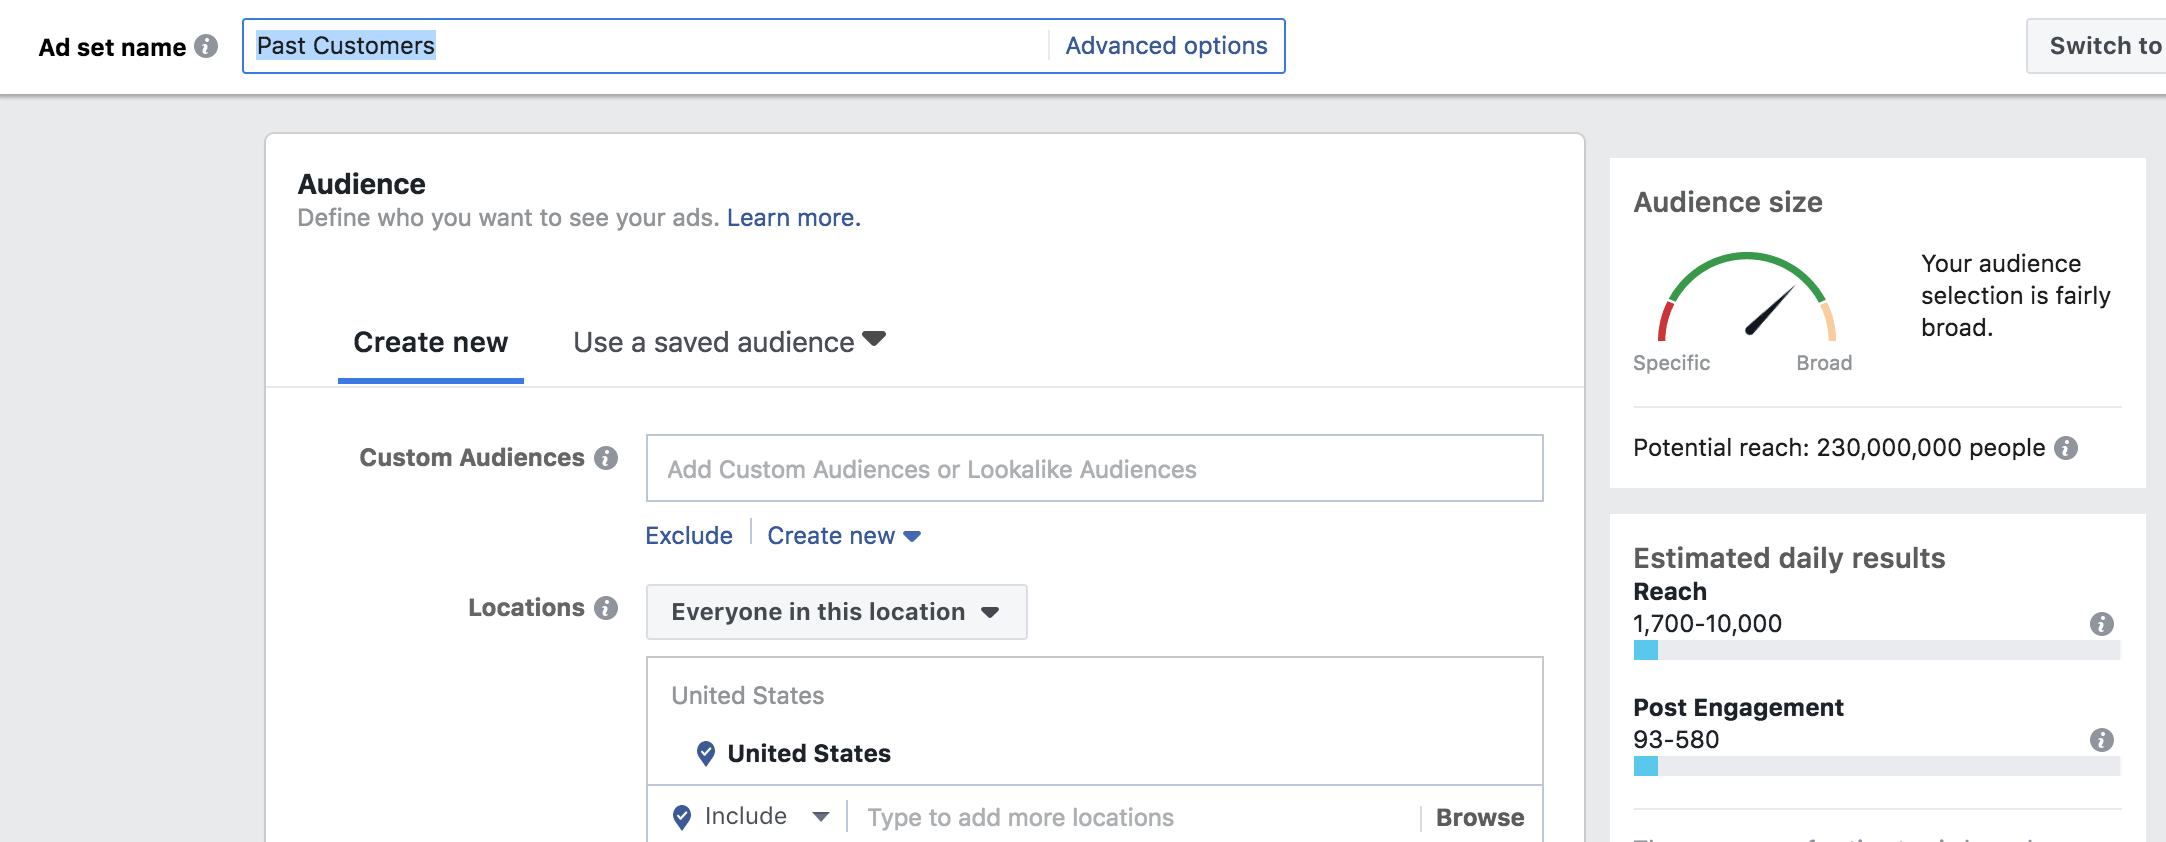
- Name your Ad Set “Past Customers”
- Enter the location you want the ad to be seen in
- Leave the other options blank as you already have a list
- Scroll down and keep the placements, “automatic”
- Finally, set a budget and schedule. You’ll want to leave the schedule as continuous.
- Because the ad is for branding, set a small budget – about $1/day to start.
- Scroll down to the bottom and click “continue”
Woohoo, you are now ready to create your first Facebook ad!
The easiest way to create an ad on Facebook is to turn your Facebook page posts into advertisements. But, not all Facebook posts will be worthy of paid advertisement. Pick a Facebook post that already has some likes or comments. Also pick a post that is useful, entertaining or educational for your customers. Preferably you have a post that does all three. This is your brand, and you want to put the best face forward.
- Make sure you select using an existing post

Next, choose the Facebook page you want to run the ad under.
Then, choose an existing post that you want to run. Remember the points above. (Entertaining, useful, educational and has likes).

A preview of the ad will show up on the bottom right.
Scroll down to the bottom of the page and click “Confirm”. Your ad will be reviewed by Facebook and you will receive a notification in Messenger as soon as it’s approved.

Congrats! You have just created an ad on Facebook! You’re a hero.


